**The Following article applies to both WoowBot and WPBot Messenger ChatBot AddOn.
Getting Started
Getting the messenger app to work requires some options to be set up in the plugin and a Verified (Individual or business) Facebook App. After installing ‘WPBot Facebook Messenger Addon’ plugin, you will be redirected to the WPBot Facebook Settings Page.
In Setting page there are a couple of fields you have to fill up.
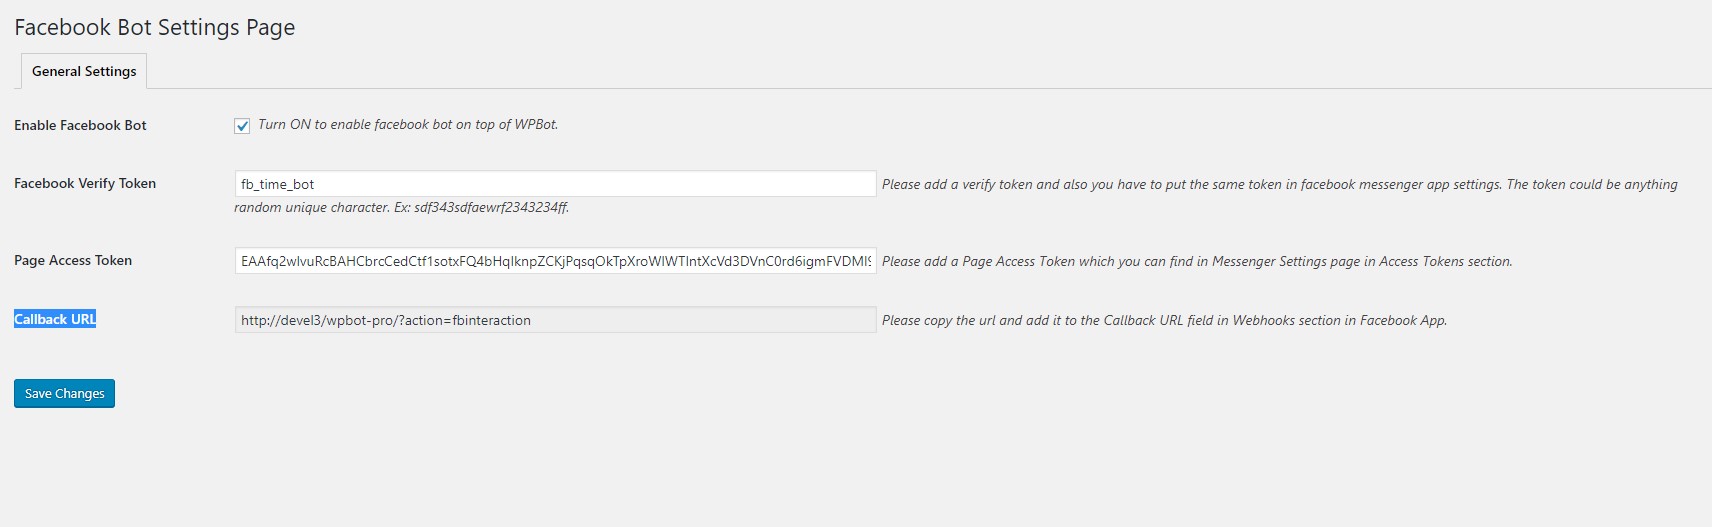
- Enable Facebook Bot : Turn it on to enable Facebook bot on top of WPBot.
- Facebook Verify Token : Please provide a verify token which is any random string of numners and letters. Facebook will use this token for verification chanllange. You will also add the same token in facebook app settings page which is discused below.
- Page Access Token : You have to provide the Page Access Token here which you can find in facebook app settings page in Access Tokens section. We have provided step by step instruction for creating a facebook app in below section.
- Callback URL : This is the main url where Facebook will interact with the WPBot. You have to copy the url and paste it into the Webhooks Callback URL field in Facebook app settings page. We have provided step by step instruction for creating a facebook app in below section.
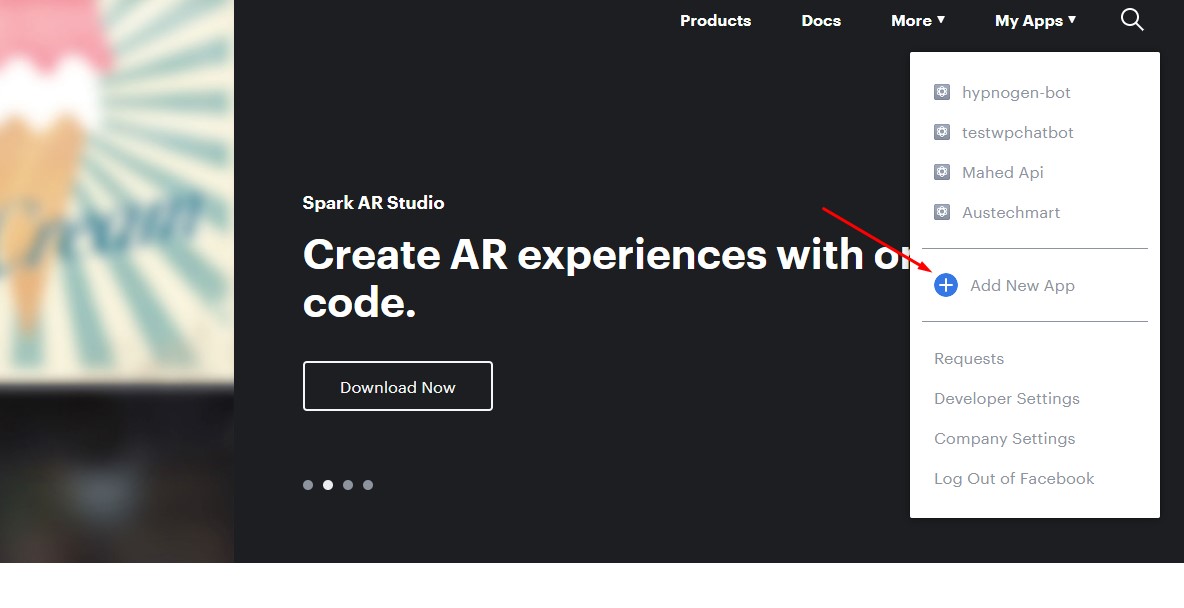
- Go to the https://developers.facebook.com/ and youlog in using your facebook account. After that you will see a menu called “My Apps” and underneath of My Apps there is another menu called “Add New App”. Please click on the “Add New App” Menu.
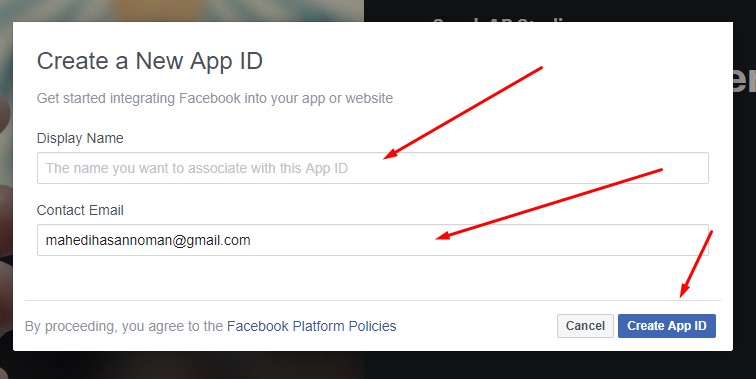
- A Popup box will show up and should say Create a New App ID. Please provide a Display name for your app and Contact email then hit the Create App ID button.
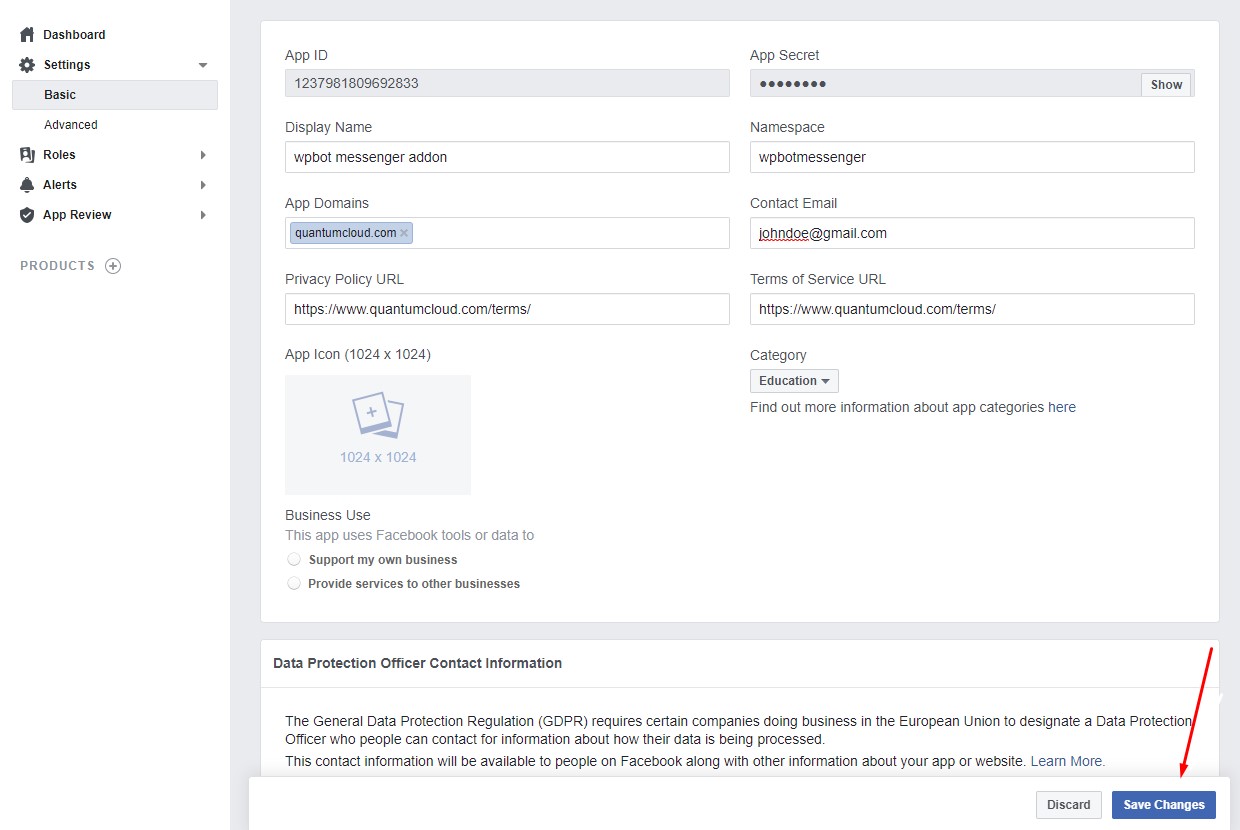
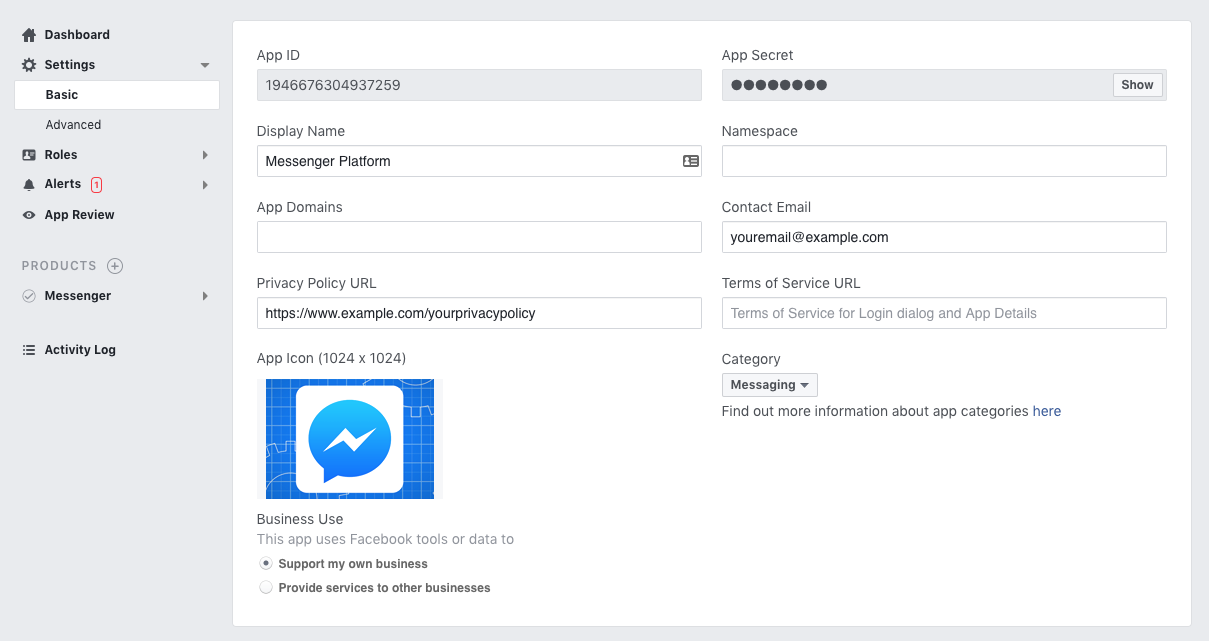
- After successfully creating the App ID you will be redirected to Dashboard page the the App. Here you will see a form like below screenshot. Please fill the form and hit the “Save Change” Button.
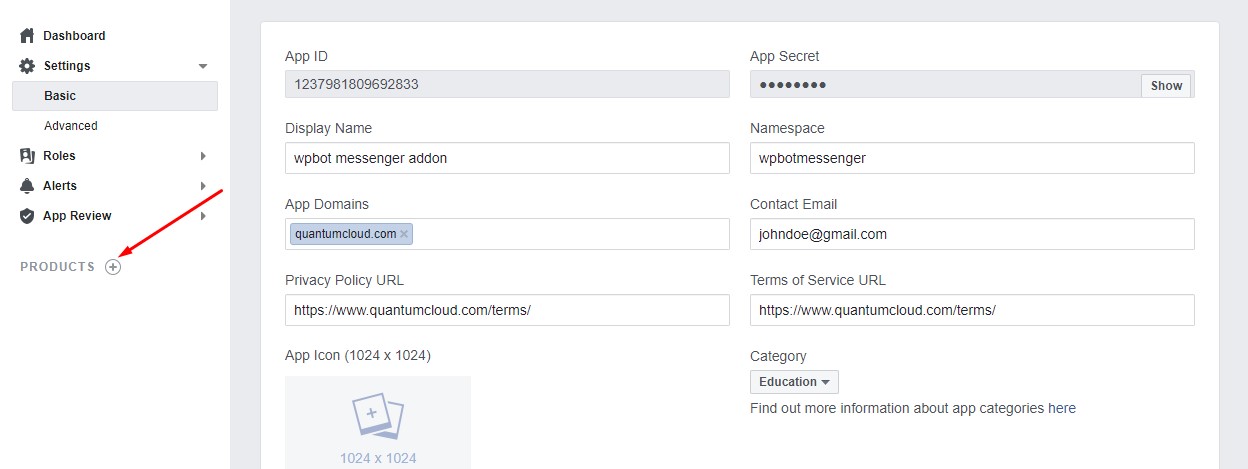
- After you are done with the Basic settings you have add products in your facebook app. In order to do that please click on the “Products” button from left menu.
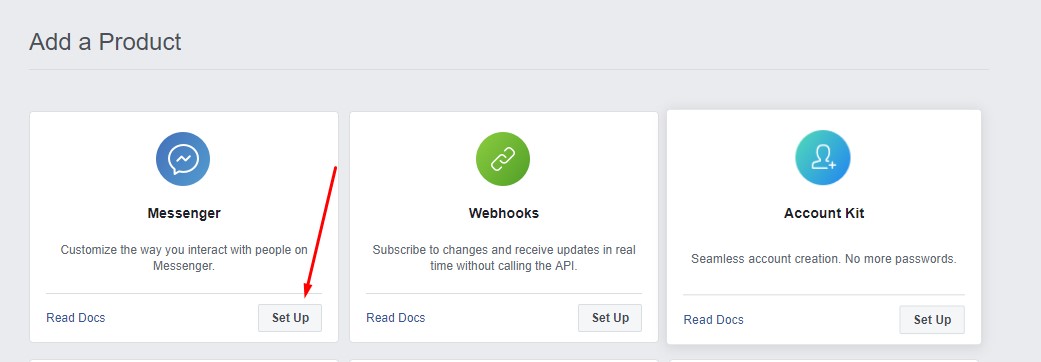
- Now you should be redirected to “Add A Product” page. Here all Facebook products are listed you just click on the Setup button for Messenger.
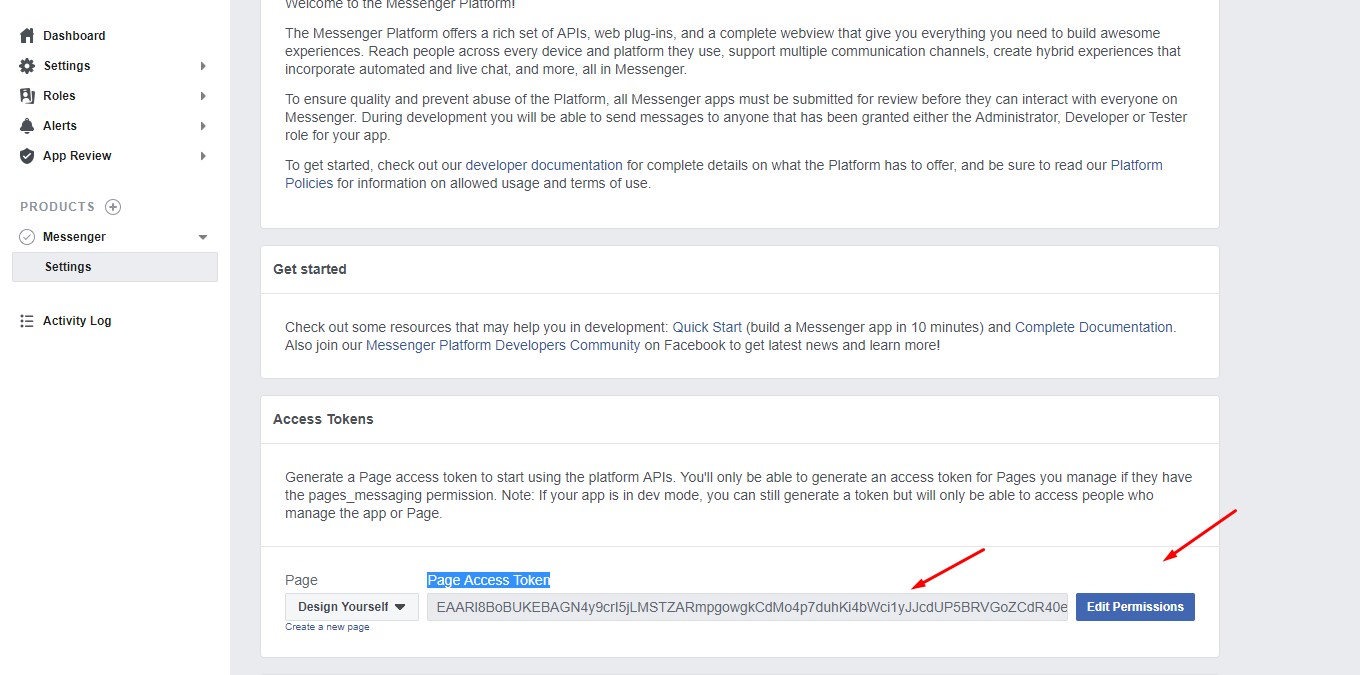
- Now Messenger is added to your product list. Scroll down to “Access Tokens” Section from the Messenger Settings Page and select your Facebook page from page drop down ( If you don’t have any page then you need to create one) and then Edit Permissions. After Permissions are added you will see the Page Access Token in Page Access Token field. Now you have copy the Page Access Token and add it to the WPBot Facebook settings page in Page Access Token field.
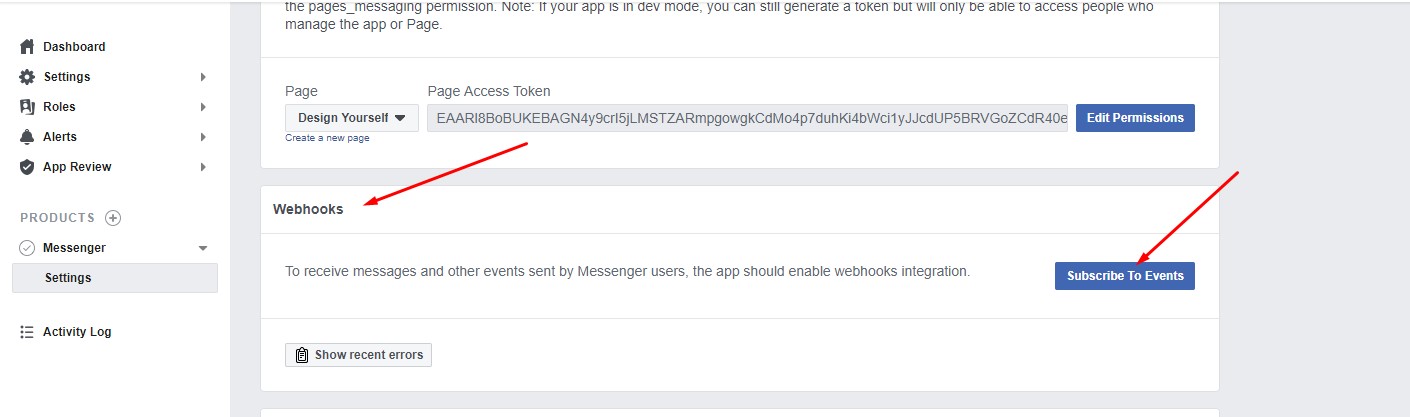
- Now scroll down to Webhooks section and click on Subscribe To Events.
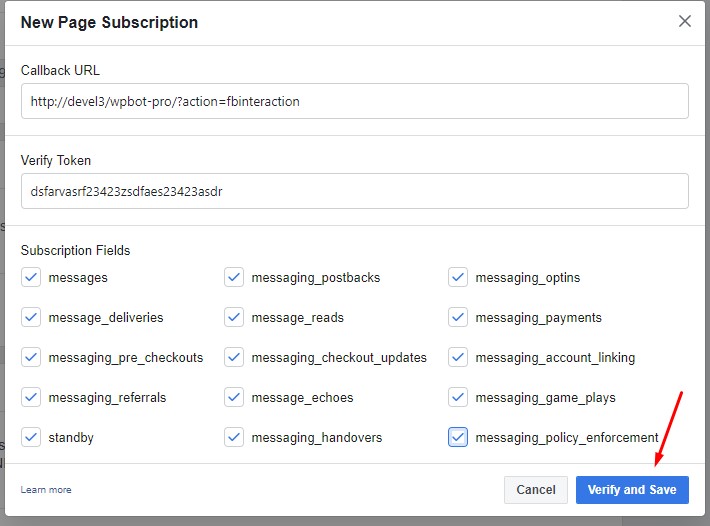
- A New Page Subscription form will show up like the screenshot below. In Callback URL field you have to provide the Callback URL(The url must start with https://) you got in WPBot Facebook Setting Page and copy the Verify Token you have created in WPBot Facebook Settings in Verify Token field. After that check all the Subscription Fields and hit “Verify and Save” button. Please note before hitting the “Verify and Save” button you have to save the WPBot Facebook Setting page with all the related settings filled up.
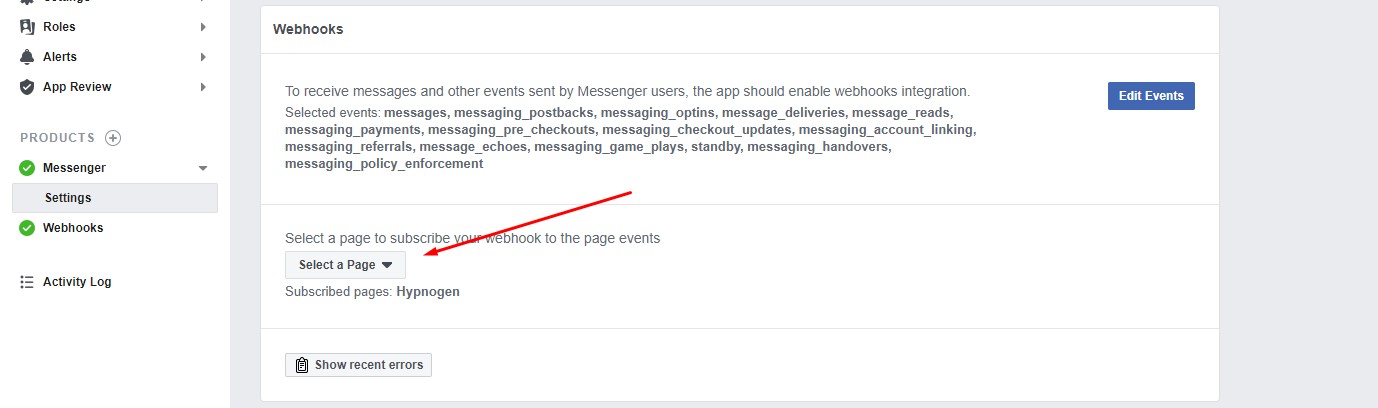
- Slect a page from Select A Page dropdown to subscribe your webhook to the page events.
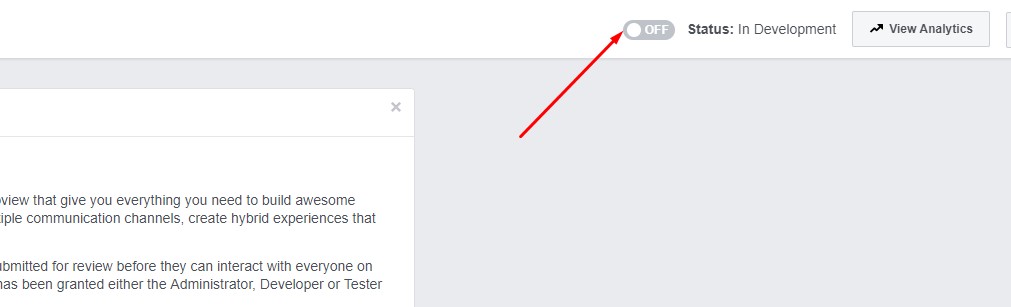
- Now you are close but still a few steps are required. Leave the app In Development mode.
Publishing Your Messenger Bot
When you are ready to release your bot to the public, you must submit it to the Facebook team for review and approval. This review process allows FaceBook to ensure your Messenger bot abides by their policies and functions as expected before it is made available to everyone on Messenger. You can find more details regarding messenger bot approval here https://developers.facebook.com/docs/messenger-platform/app-review/
To submit your bot, review the requirements and follow the steps below.
- Configure Your App SettingsAt a minimum, you must provide the following basic information in the app console under Settings > Basic:
- App Icon
- Privacy Policy URL
- Category
- Business Use
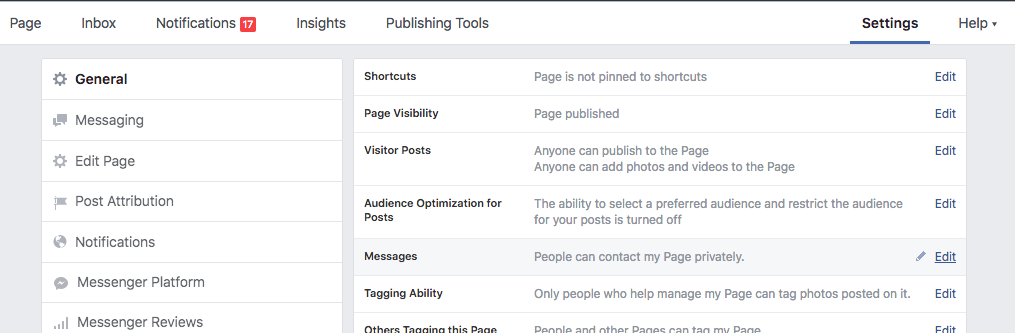
 Allow Users to Message Your PageTo receive messages from users, you must enable messaging for your Page. To do this, do the following:
- Go to Page Settings > General.
- In the ‘Messages’ section, click the ‘Edit’ button.
- Select the ‘Allow people to contact my Page privately by showing the Message button’ checkbox.
- Click ‘Save Changes’
Put Your Bot in Development Mode
Now that you are ready to submit, ensure your bot is set to development mode in your app settings.
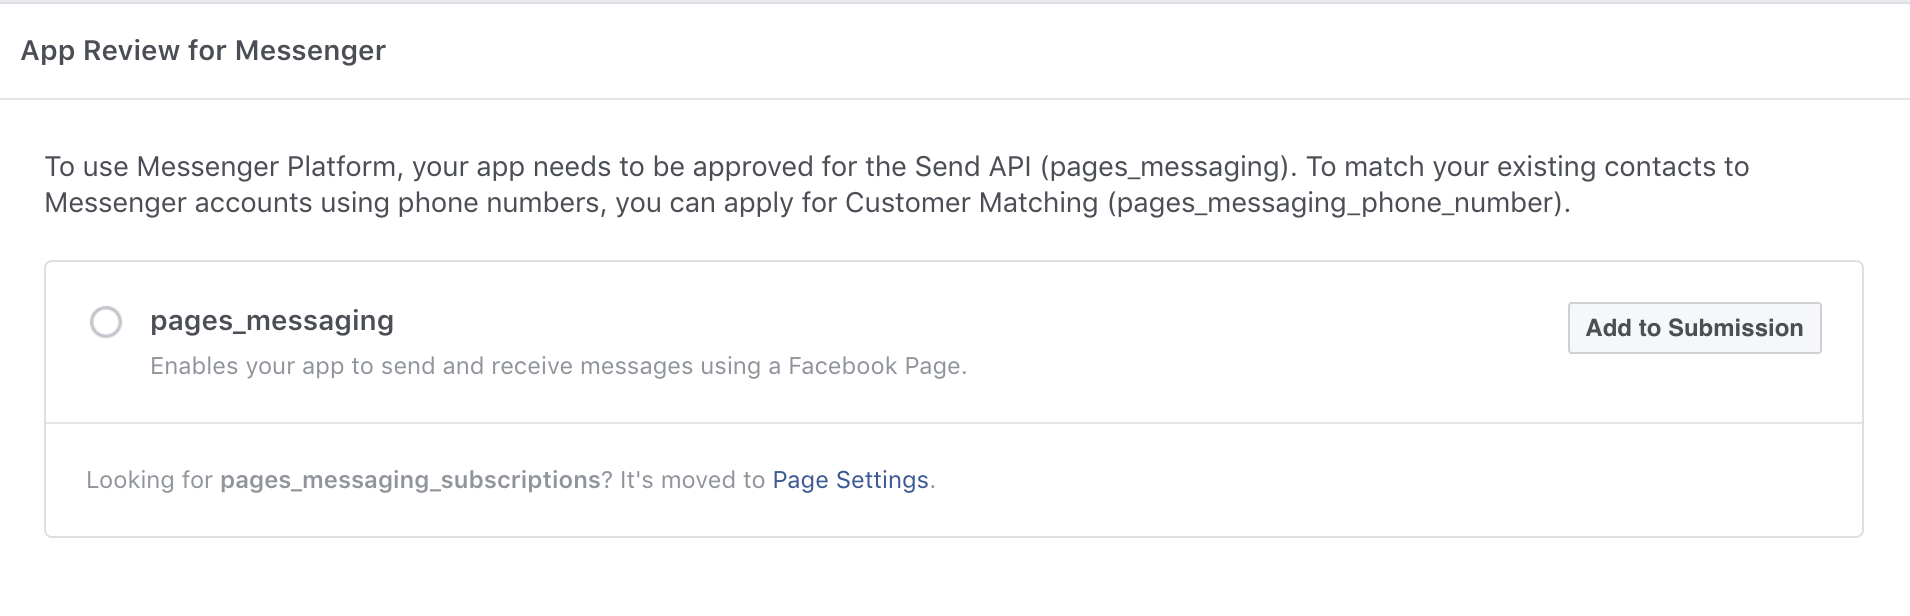
Select app permissions
In the ‘App Review’ section of the Messenger settings for your Facebook app, click the ‘Add to Submission’ button for each permission your bot requires. Added permissions will appear in the ‘Current Submission’ section below.
During the review process, Facebook team will test your bot to ensure each of these permissions is needed, and that your bot complies with any related messaging policies. At a minimum, you should request the pages_messaging permission, which allows your bot to send messages.
Add Submission Details
In the ‘Current Submission’ section, click the ‘Add Details’ button for each requested permission. For each permission, a dialog will be displayed with a form for supplying additional information. Complete each form to provide our team with the required information.
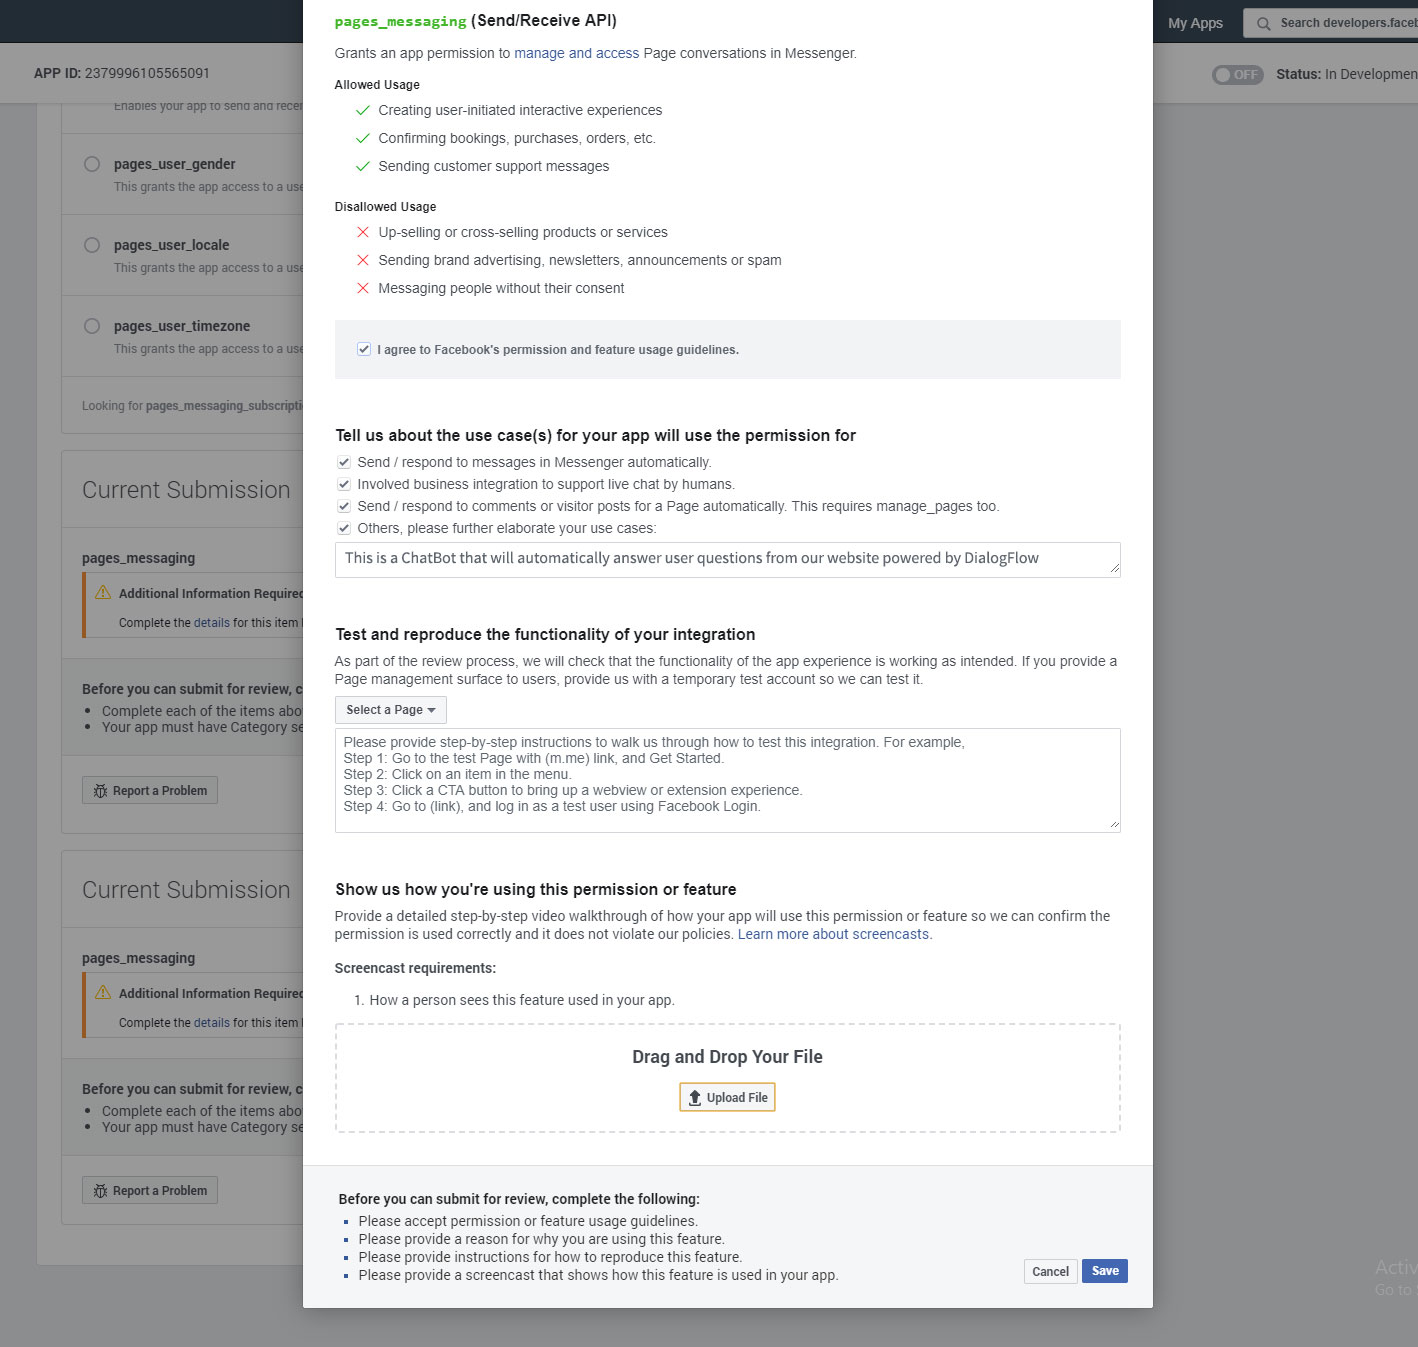
Here are some sample Descriptions that you can use:
Description: This is a ChatBot that will automatically answer user questions from our website powered by DialogFlow
Testing functioality: 1. Go to the selected FaceBook page
2. Send Message to the page
3. It will connect with a ChatBot on our website and reply to messages using AI and NLP automatically
4. The chatbot on our website is powered by DialogFlow
You can also download the video and Upload that to demonstrate how the app will work.

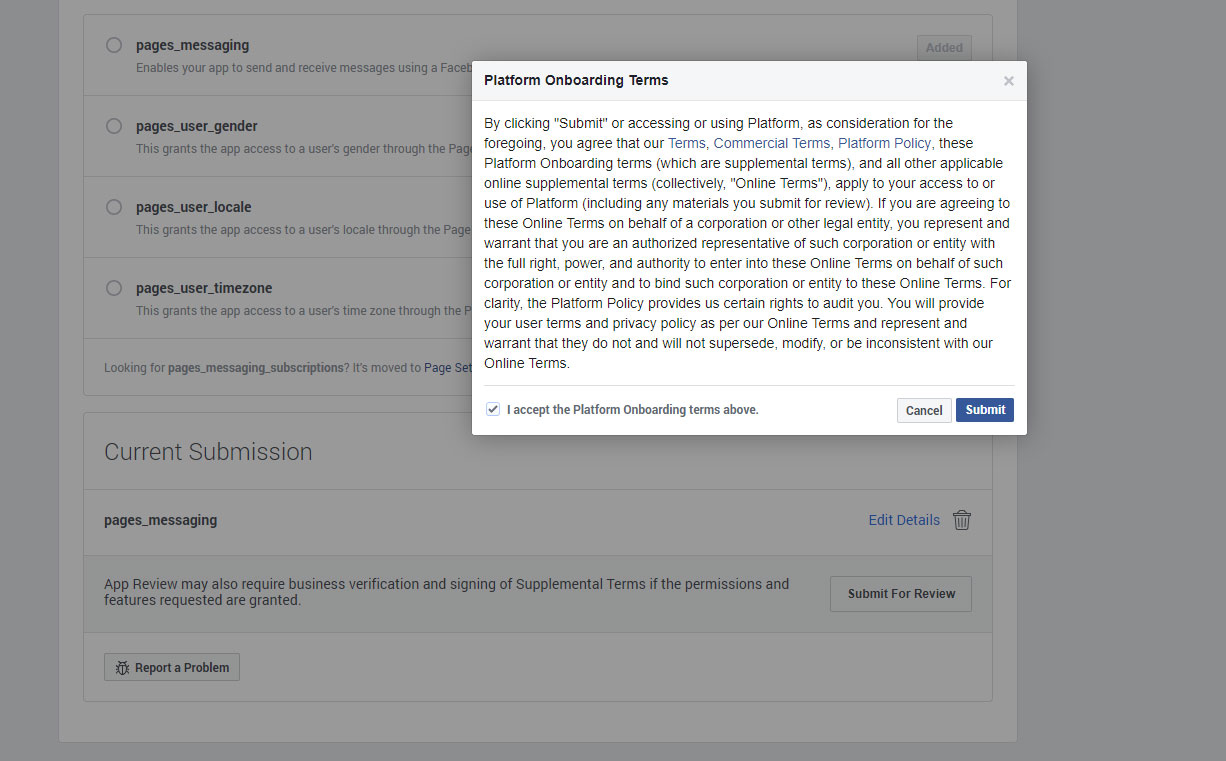
Submit your bot
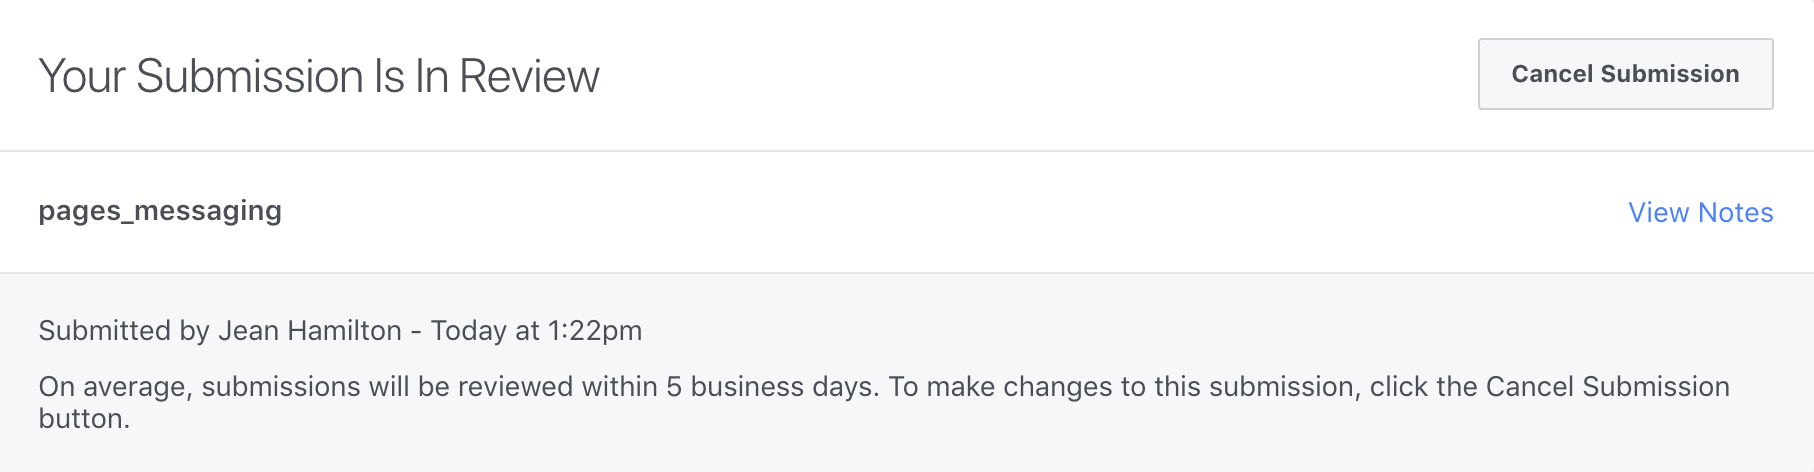
Click the ‘Submit for Review’ button to submit your bot. The name of the person who submitted the bot and the time it was submitted will be displayed.
After your bot is submitted, Facebook review team will send messages to your bot to test for responsiveness, functionality, and policy compliance. Please note that FB team may message/use your bot several times over the course of multiple days.
Provide Verification Information and Documents
Once your bot has been reviewed for responsiveness, functionality, and policy compliance, you will receive a message asking you to complete business verification or individual verification in the ‘Alerts’ tab of the app console.
Business Verification VS Individual verification
Individual verification is sufficient in most of the cases. Technically, Individual verification provides all the permissions needed. The only limitation is that the apps that use individual verification may subscribe to receive webhook events for a maximum of 3 Pages which is usually sufficient for most businesses.
To begin verification, click the ‘Start Individual/Business Verification’ button in the message. You will be asked to provide the relevant documents for Individual or business verification. Individual verification requires only some form of valid ID like a scanned copy of your passport. Business verification will require Business license (preferred), Certificate of formation,Articles of incorporation document, Business utility or phone bill etc.
It usually takes 3-7 days for FaceBook to approve.
Watch for Approval Alerts
Once your app has passed review and verification, it will be approved!
Once your bot is approved, Facebook team will send you a Facebook notification. A green checkmark will also appear next to the pages_messaging permission under ‘App Review for Messenger’.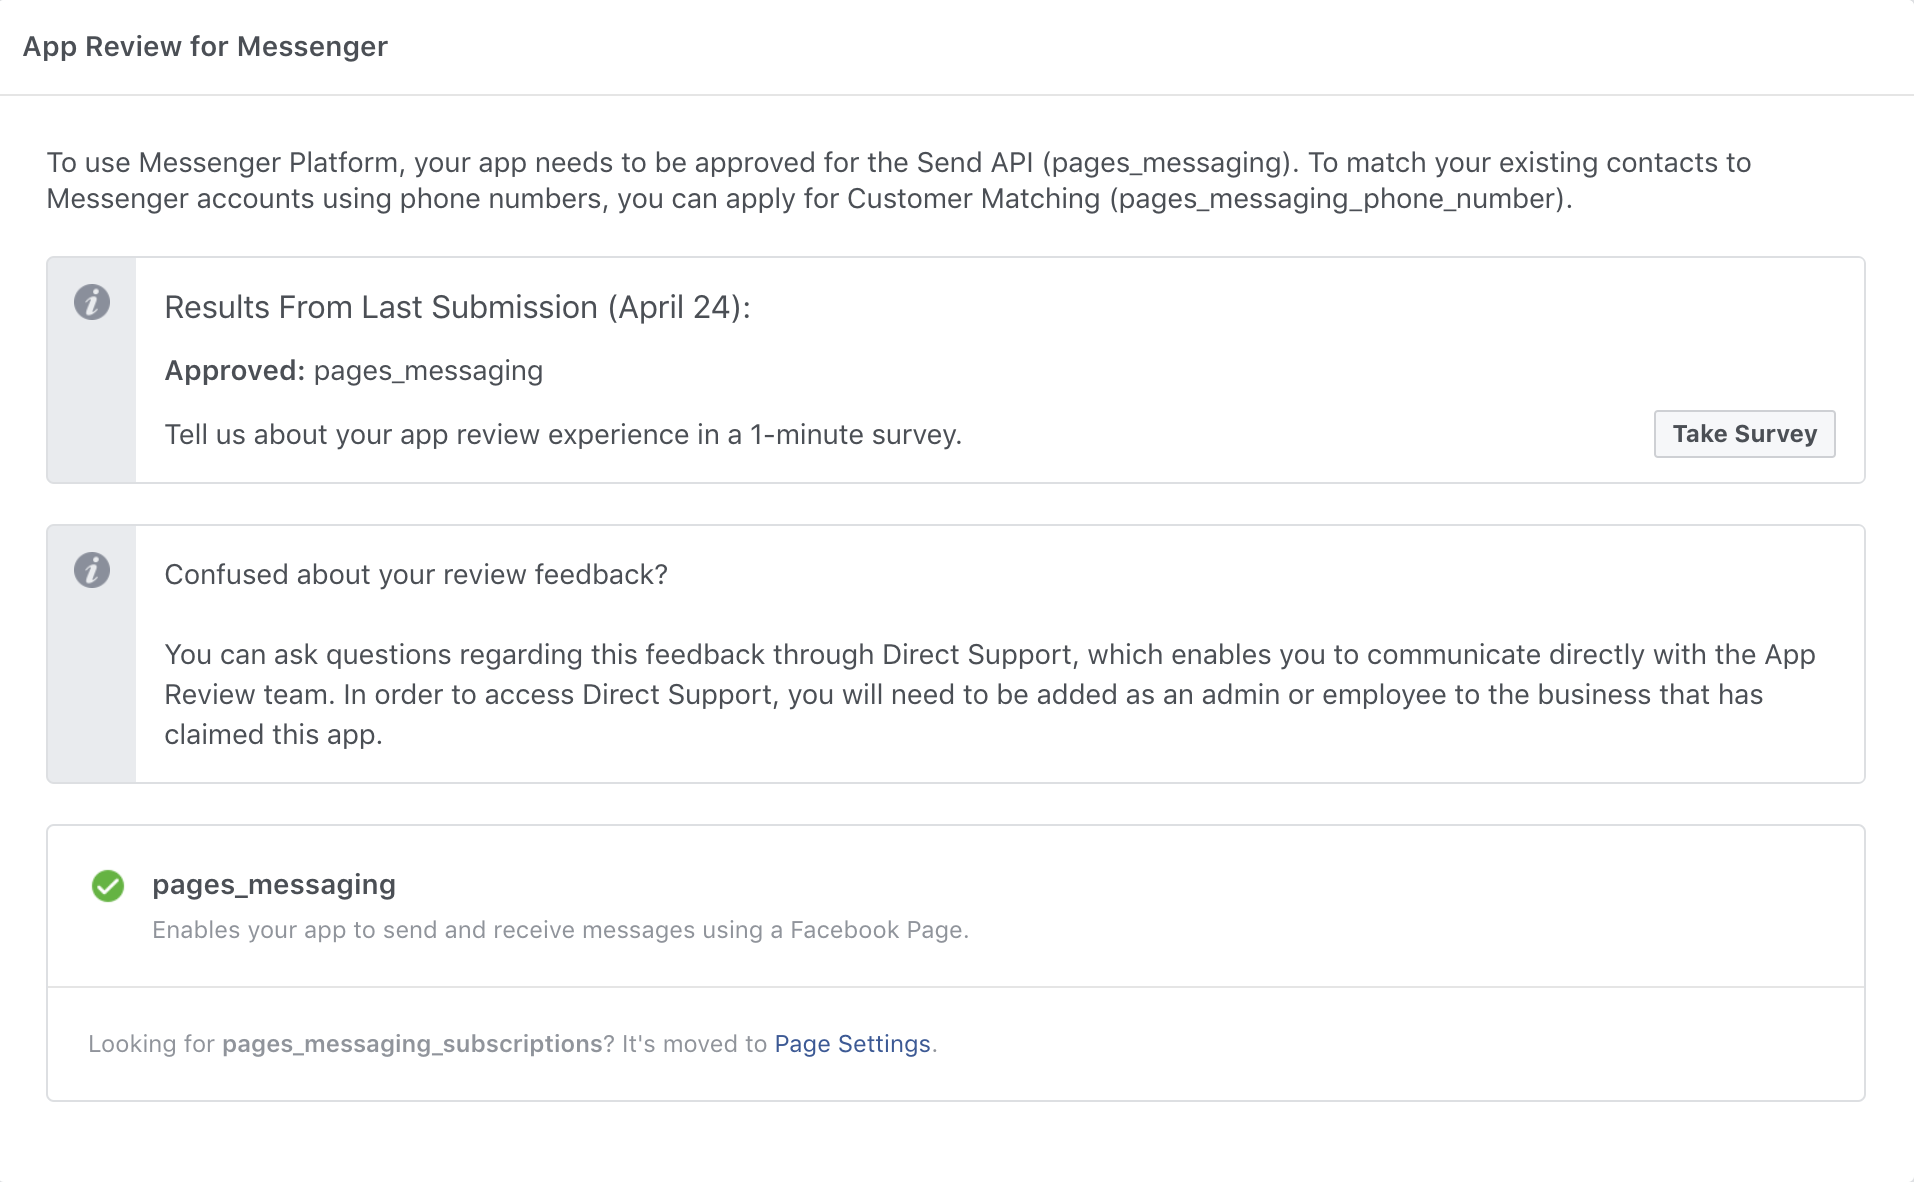
You can find more details regarding messenger bot approval here https://developers.facebook.com/docs/messenger-platform/app-review/